
티스토리 뷰
Introduction
아래 링크를 참고할것.
installation
근래에는 package repo를 제공하고 있기에 해당 repo를 등록하여 설치하는 것을 권장한다.
[root@vault-server ~]# dnf config-manager --add-repo https://rpm.releases.hashicorp.com/RHEL/hashicorp.repo
Adding repo from: https://rpm.releases.hashicorp.com/RHEL/hashicorp.repo
[root@vault-server ~]# dnf install -y boundary
Hashicorp Stable - x86_64                                                                                                                    7.9 kB/s | 1.4 kB     00:00
Dependencies resolved.
=============================================================================================================================================================================
 Package                                   Architecture                            Version                                  Repository                                  Size
=============================================================================================================================================================================
Installing:
 boundary                                  x86_64                                  0.1.1-1                                  hashicorp                                   17 M

Transaction Summary
=============================================================================================================================================================================
Install  1 Package

Total download size: 17 M
Installed size: 47 M
Downloading Packages:
boundary-0.1.1-1.x86_64.rpm                                                                                                                  5.0 MB/s |  17 MB     00:03
-----------------------------------------------------------------------------------------------------------------------------------------------------------------------------
Total                                                                                                                                        5.0 MB/s |  17 MB     00:03
Running transaction check
Transaction check succeeded.
Running transaction test
Transaction test succeeded.
Running transaction
  Preparing        :                                                                                                                                                     1/1
  Running scriptlet: boundary-0.1.1-1.x86_64                                                                                                                             1/1
  Installing       : boundary-0.1.1-1.x86_64                                                                                                                             1/1
  Verifying        : boundary-0.1.1-1.x86_64                                                                                                                             1/1
Installed products updated.

Installed:
  boundary-0.1.1-1.x86_64

Complete!
How to use
hashicorp 제품들의 특징인 Dev mode와 non-dev mode (즉, production)가 존재하고 먼저 체감을 위해 dev mode로 동작시켜보자.
Dev mode
Server
우선 아래는 dev mode로 동작시킨 결과이다.
[root@vault-server ~]# boundary dev
==> Boundary server configuration:

       [Controller] AEAD Key Bytes: ywNK4h4nMwYDe6gTpbSURT3HzjQkRmUlWY9V0ixjLxw=
         [Recovery] AEAD Key Bytes: PDEPulCEe7FPO0mqVxSLgXASgosb6sDLrfkVPHxFBog=
      [Worker-Auth] AEAD Key Bytes: eSDfMmQh3hJkj0bSw9kkLf00XqwectUOiB8yvu+KoPs=
              [Recovery] AEAD Type: aes-gcm
                  [Root] AEAD Type: aes-gcm
           [Worker-Auth] AEAD Type: aes-gcm
                               Cgo: disabled
            Dev Database Container: zealous_lamport
                  Dev Database Url: postgres://postgres:password@localhost:32768?sslmode=disable
          Generated Auth Method Id: ampw_1234567890
  Generated Auth Method Login Name: admin
    Generated Auth Method Password: password
         Generated Host Catalog Id: hcst_1234567890
                 Generated Host Id: hst_1234567890
             Generated Host Set Id: hsst_1234567890
            Generated Org Scope Id: o_1234567890
        Generated Project Scope Id: p_1234567890
               Generated Target Id: ttcp_1234567890
                        Listener 1: tcp (addr: "127.0.0.1:9200", max_request_duration: "1m30s", purpose: "api")
                        Listener 2: tcp (addr: "127.0.0.1:9201", max_request_duration: "1m30s", purpose: "cluster")
                        Listener 3: tcp (addr: "127.0.0.1:9202", max_request_duration: "1m30s", purpose: "proxy")
                         Log Level: info
                             Mlock: supported: true, enabled: false
                           Version: Boundary v0.1.1
                       Version Sha: eccd68d73c3edf14863ecfd31f9023063b809d5a
                Worker Public Addr: 127.0.0.1:9202

==> Boundary server started! Log data will stream in below:

2020-10-24T13:20:06.854Z [INFO]  controller: cluster address: addr=127.0.0.1:9201
2020-10-24T13:20:06.855Z [INFO]  worker: connected to controller: address=127.0.0.1:9201
2020-10-24T13:20:06.861Z [INFO]  controller: worker successfully authed: name=dev-worker
2020-10-24T13:20:06.870Z [WARN]  worker: got no controller addresses from controller; possibly prior to first status save, not persisting
위와 같이 3개의 port를 listen하고 있다.
- Controller
- Cluster
- Worker
dev mode로 외부 IP로 동작시켜보았다.
[root@vault-server boundary-test]# boundary dev -tls-insecure -cluster-listen-address=192.168.201.81 -api-listen-address=192.168.201.81 -worker-public-address=192.168.201.81 -proxy-listen-address=192.168.201.81
==> Boundary server configuration:

       [Controller] AEAD Key Bytes: kT8jVJ8uD9mmvlsTWlsAfvTa6W6rqvwPgFszSZUzcp8=
         [Recovery] AEAD Key Bytes: 5tStg58x4NeuRYBlrIostzYc35wd4z7es47ZDlkIumI=
      [Worker-Auth] AEAD Key Bytes: uhAlg8FfiP/gU4+SIDLGcT6/xCGM5rFtwpRzlUR6BdE=
              [Recovery] AEAD Type: aes-gcm
                  [Root] AEAD Type: aes-gcm
           [Worker-Auth] AEAD Type: aes-gcm
                               Cgo: disabled
            Dev Database Container: quirky_bohr
                  Dev Database Url: postgres://postgres:password@localhost:32781?sslmode=disable
          Generated Auth Method Id: ampw_1234567890
  Generated Auth Method Login Name: admin
    Generated Auth Method Password: password
         Generated Host Catalog Id: hcst_1234567890
                 Generated Host Id: hst_1234567890
             Generated Host Set Id: hsst_1234567890
            Generated Org Scope Id: o_1234567890
        Generated Project Scope Id: p_1234567890
               Generated Target Id: ttcp_1234567890
                        Listener 1: tcp (addr: "192.168.201.81:9200", max_request_duration: "1m30s", purpose: "api")
                        Listener 2: tcp (addr: "192.168.201.81:9201", max_request_duration: "1m30s", purpose: "cluster")
                        Listener 3: tcp (addr: "192.168.201.81:9202", max_request_duration: "1m30s", purpose: "proxy")
                         Log Level: info
                             Mlock: supported: true, enabled: false
                           Version: Boundary v0.1.1
                       Version Sha: eccd68d73c3edf14863ecfd31f9023063b809d5a
                Worker Public Addr: 192.168.201.81:9202

==> Boundary server started! Log data will stream in below:

2020-10-26T05:54:26.837Z [INFO]  controller: cluster address: addr=192.168.201.81:9201
2020-10-26T05:54:26.837Z [INFO]  worker: connected to controller: address=192.168.201.81:9201
2020-10-26T05:54:26.845Z [INFO]  controller: worker successfully authed: name=dev-worker
Dev mode에서는 서버의 설정을 크게 할 것이 없다. 이유는 postgres가 자동으로 docker image를 pull 받아와 동작되고 이에 연결되도록 되어 있기 때문이다. 만약 non-dev mode로 동작시키고자 할 경우 3개의 port가 암시했듯이 다양한 구성을 만들수 있고 이와 연계되어 좀 복잡한 구성이 될수도 있다.
즉, Dev mode에서는 다음과 같은 항목이 필수로 동작되어야 한다.
- Docker daemon이 동작
- Postgres Docker image를 pull 받아올수 있거나 local에 image cache 되어 있어야 함
- 참고로 podman은 아직 안되는것으로 보임..(podmon 환경에서는 에러 발생되었음)
실제 boundary dev 만으로도 postgres db가 자동으로 pull and run 되는것을 볼수 있다.
[root@vault-server ~]# docker ps
CONTAINER ID        IMAGE               COMMAND                  CREATED             STATUS              PORTS                     NAMES
8b8938abd23f        postgres:12         "docker-entrypoint.s…"   19 seconds ago      Up 17 seconds       0.0.0.0:32768->5432/tcp   zealous_lamport
UI Settings
접속하고자 하는 서버를 Target으로 등록하여 연결이 이루어지고 session 관리가 되어질수 있도록 해보자.
먼저 아래와 같이 Host set을 생성을 진행한다.

생성된 Host set에 이름을 지정하고 생성을 완료한다.

생성된 host set에 실제로 접속할 host 정보를 생성한다.
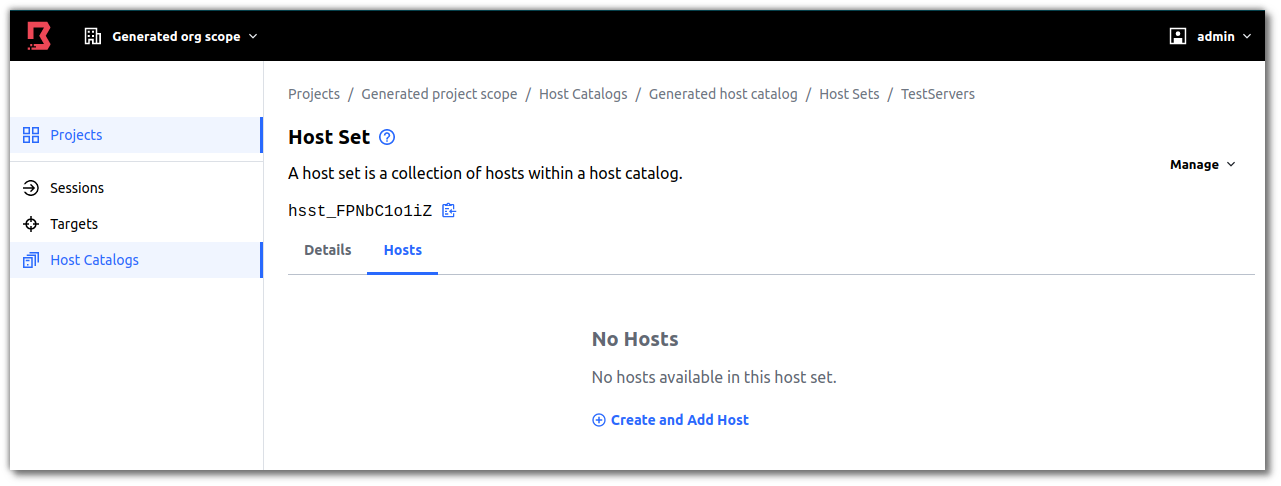
이름과 Address를 추가하여 생성을 완료한다.
(단순 IP 혹은 domain만 넣으면 된다. 이유는 target 지정시 port를 지정할 예정이기 때문이다.)

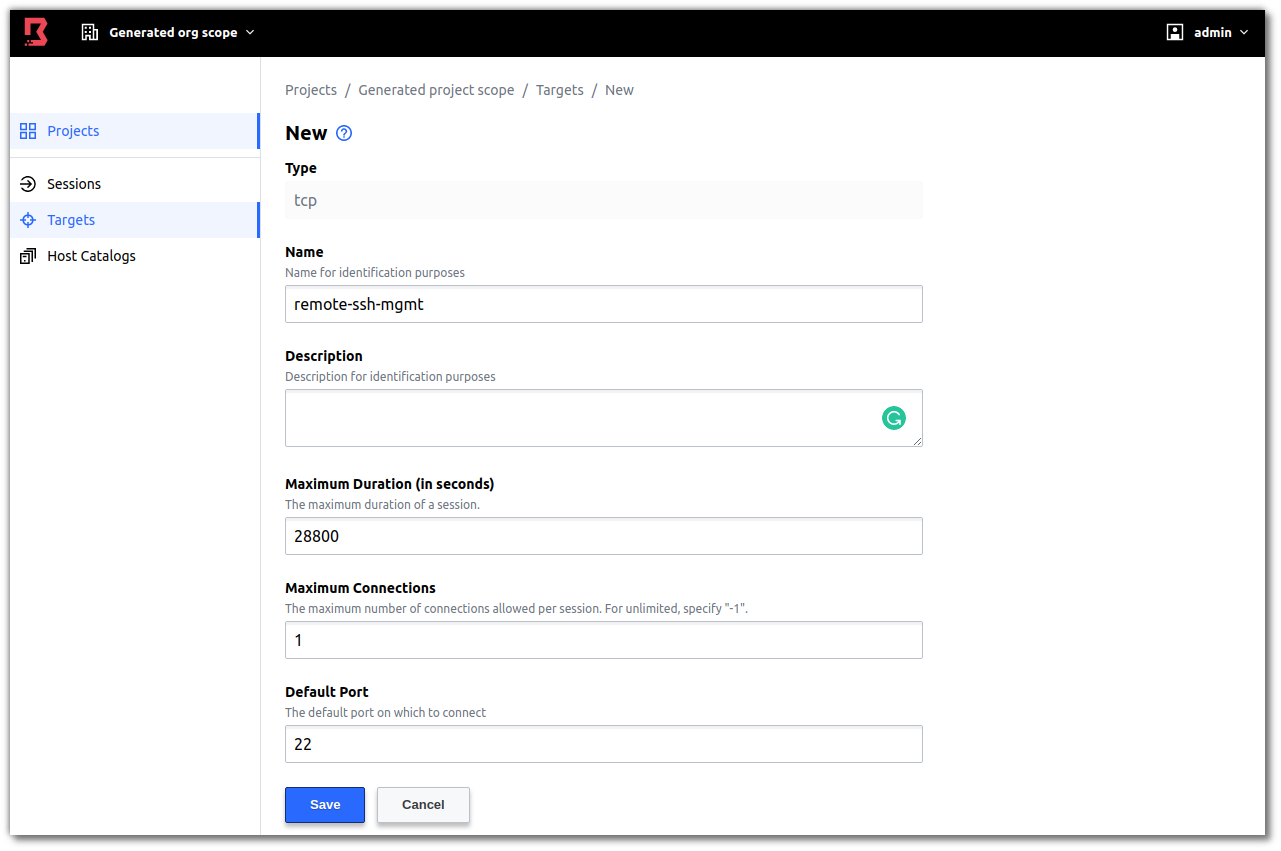
이후 Target(port 정보가 들어간)을 생성하자.
이제 앞서 생성했던 host set을 해당 target에 추가해보자.

앞서 생성했떤 TestServers리스트가 보여지며 이를 추가하면 된다.
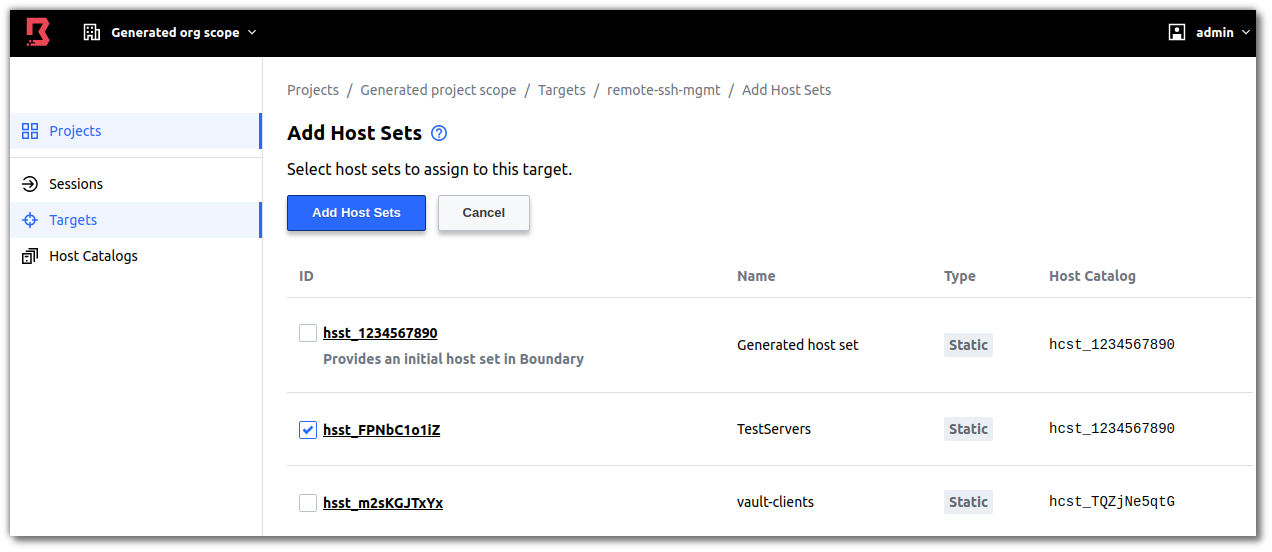
생성이 완료되었다.

이제 Client가 여기서 만들어진 Target의 ID를 통해 접근을 할수 있게 되었다.
Client
우선 아래와 같이 boundary에 인증과정을 거쳐 boundary의 target을 사용할수 있도록 준비를 해야 한다.
[root@vault-server ansible-boundary]# boundary authenticate password -auth-method-id=ampw_1234567890 \
>     -login-name=admin -password=password

Authentication information:
  Account ID:      apw_ffBB1u6Y8S
  Auth Method ID:  ampw_1234567890
  Expiration Time: Mon, 02 Nov 2020 07:44:00 UTC
  Token:
  at_oXd7DQq2cA_s17UJAiJXHyvNuzA3uKXYT8WXBZJ7W3w578ePPyp2BxwJHVjg3Ugo9UDNkET4H6yPhWi7WScZHetmTc2Gu4qA821sgbCvHbtaHPCMm1GfFa8Kbf
  User ID:         u_1234567890
Error opening "pass" keyring: Specified keyring backend not available
The token printed above must be manually passed in via the BOUNDARY_TOKEN env var or -token flag. Storing the token can also be disabled via -keyring-type=none.
물론 위 token의 경우 서버에서 생성해서 client에게 전달해주어도 될거라 보인다.
이제 아래의 환경변수를 추가하여 boundary의 접속이 가능하도록 만들자.
export BOUNDARY_ADDR=http://192.168.201.81:9200
export BOUNDARY_TOKEN=at_oXd7DQq2cA_s17UJAiJXHyvNuzA3uKXYT8WXBZJ7W3w578ePPyp2BxwJHVjg3Ugo9UDNkET4H6yPhWi7WScZHetmTc2Gu4qA821sgbCvHbtaHPCMm1GfFa8Kbf
이제 접속 준비가 되었다. 아래와 같은 target list 명령을 통해 target ID를 확인하자.
jacob@jacob-laptop:~$ boundary targets list -scope-id=p_1234567890

Target information:
  ID:             ttcp_1234567890
    Version:      1
    Type:         tcp
    Name:         Generated target
    Description:  Provides an initial target in Boundary

  ID:             ttcp_yFIR1qy0f5
    Version:      4
    Type:         tcp
    Name:         test-server-ssh

  ID:             ttcp_HUzNO2VoGD
    Version:      2
    Type:         tcp
    Name:         web-servers
참고
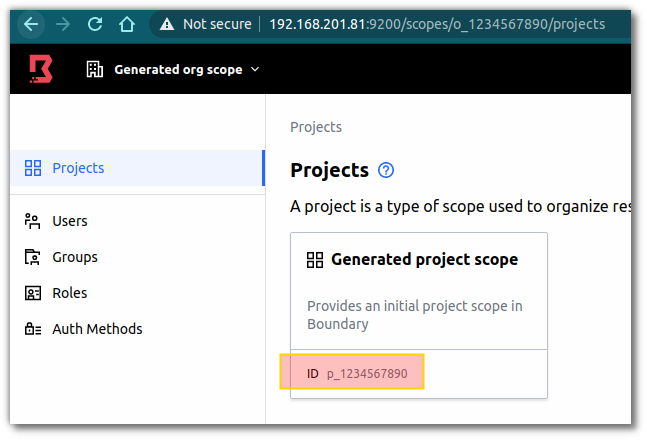
global scope이 default로 되어 있어 다른 scope의 경우 command에서는 확인이 안된다.
해당 scope_ID는 정보는 UI를 들어가 확인해보자
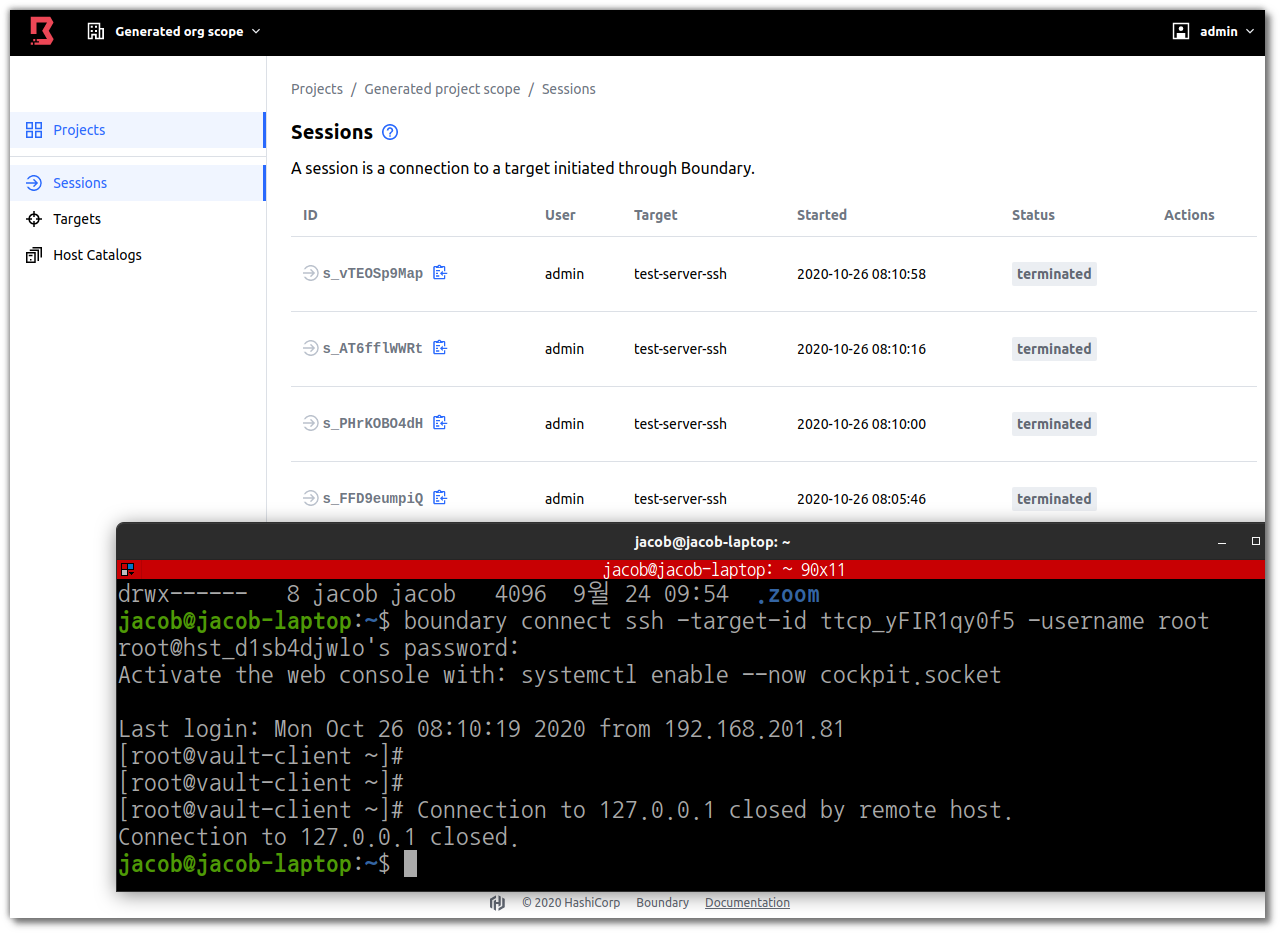
위 target중 ssh 접속을 해볼것이기 때문에 test-server-ssh로 지정된 ID(ttcp_yFIR1qy0f5)를 사용하여 접속을 수행해보도록 하자.
jacob@jacob-laptop:~$ boundary connect ssh -target-id ttcp_yFIR1qy0f5 -username root
root@hst_d1sb4djwlo's password:
Activate the web console with: systemctl enable --now cockpit.socket

Last login: Mon Oct 26 08:05:51 2020 from 192.168.201.81
[root@vault-client ~]#
접속이 정상적으로 이루어짐을 확인하였다.
다음과 같이 연결이 완료되면 session 메뉴상에 다음과 같은 접근된 session정보도 확인되어진다.
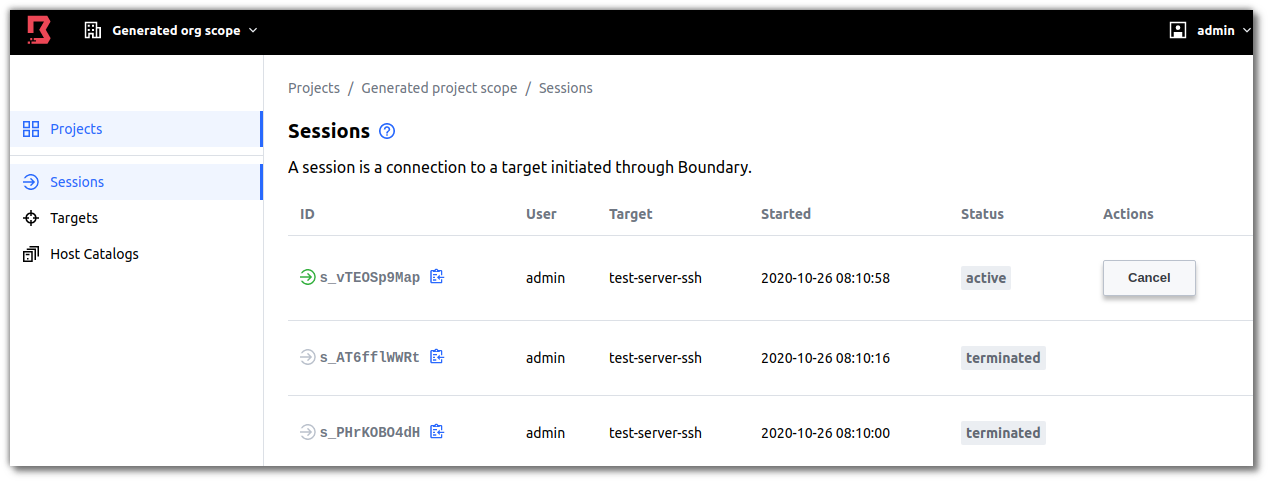
참고로 session 관리중에 cancel을 통해 연결된 세션을 끊어버릴수도 있다.
Production mode
controller.hcl example
알아두어야할것!!
ssh든, rdp든, http든 모두 boundary 명령어를 기반으로 접속을 하여야 한다.
다시말해 boundary명령을 cli로 실행해야 하는것이다. Linux에 익숙한 사용자의 경우 크게 문제되지 않을거라 판단되지만 windows 환경에 익숙한 사용자의 경우 boundary를 통한 접속이 불편할수 있을거라 보인다. shortcut 같은 바로가기를 만들어서 관리해야할 것으로 보이며 추가적인 GUI환경이 개발되면 더 좋을거라 판단된다.
또한 boundary는 개인적으로 상당히 좋은 concept을 가지고 있는것 같다 다만 조심스러운 부분은 적용을 위해 기존 서버 접근 process를 완전히 뒤엎는 방식이 될수도 있어 적용을 위해서는 상당부분 고민과 조사가 필요할 것으로 보인다.
참고사이트
'Security > Cloud Native' 카테고리의 다른 글
| Gatekeeper mutatation (0) | 2023.05.04 |
|---|---|
| Rego test and http.send (0) | 2023.05.03 |
| trivy db search (0) | 2023.04.02 |
| Hashicorp Boundary (0) | 2020.10.28 |
| How to use Vault (0) | 2020.10.23 |
- Total
- Today
- Yesterday
- hashicorp boundary
- kata container
- ansible
- Helm Chart
- mattermost
- minikube
- jenkins
- Jenkinsfile
- K3S
- nginx-ingress
- metallb
- vmware openstack
- socket
- OpenStack
- openstacksdk
- kubernetes install
- kubernetes
- GateKeeper
- wsl2
- open policy agent
- DevSecOps
- macvlan
- minio
- ceph
- aquasecurity
- crashloopbackoff
- openstack backup
- boundary ssh
- Terraform
- azure policy
| 일 | 월 | 화 | 수 | 목 | 금 | 토 |
|---|---|---|---|---|---|---|
| 1 | 2 | 3 | 4 | |||
| 5 | 6 | 7 | 8 | 9 | 10 | 11 |
| 12 | 13 | 14 | 15 | 16 | 17 | 18 |
| 19 | 20 | 21 | 22 | 23 | 24 | 25 |
| 26 | 27 | 28 | 29 | 30 |